
I made a monogrammed sign board for one of my best friends, Kelly, and her fiance' Aaron. Her surprise engagement party is this weekend, so I thought that this would be a fantastic gift that they could hang up when they get their first house.
I'm sorry the pictures are of poor quality, I really need to invest in a better camera. All in due time!
Step 1: I got a medium sized wood slab from Michael's and painted the whole thing, front and back, with white paint. I had several coats of paint, you can eyeball it until it's the opacity you desire. I'm pretty sure I ended up using about a bottle and a half of white paint. Make sure you paint thin coats, this will stop the paint from becoming too thick/gloopy. It will also make the drying time between coats exponentially shorter.

Step 2: For the outer thirds of the sign, I wanted to create thick horizontal black and white stripes. The middle of the sign is going to be a solid base color accented with a border of a complementary color. I laid down my vertical tape first. Where the vertical tape lies is where the border color is going to be.

Step 3: I painted the open horizontal spaces with three coats of black. Giving ample time for it to dry between coats.

Step 4: I pulled off the tape after it dried. You're technically supposed to take of the painters tape while your last coat is still wet for cleaner lines. I did not do that, only because i'm clumsy, and I didn't want to accidentally smear something.

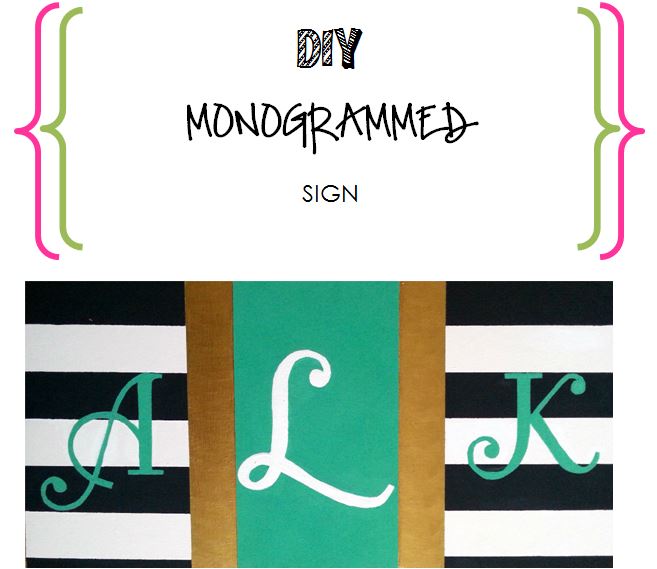
Step 5: I painted the inner thirds base color. I chose teal because it's fairly gender neutral. I used the "V" technique that you use when you paint walls. I also did a thin layer of a yellow and white mix to lighten the teal and give it a more spring hue. I added painters tape to the outer boarders of the accent colors space so that when I took that tape off there would be a clean working space.

Step 6: After the teal dried I added the painters tape to the inner border's space just like I did with the outer border's space. I unfortunately didn't document when I painted the accent color. I chose a gorgeous dark, brassy gold because golds and greens are very complementary.

Step 7: Also not documented, I'm sorry about that! I found a font that I loved and printed out Kelly's first initial, Aaron's first initial and the first initial in their last name. In a monogram the last name is in the middle and is larger than the rest. I cut out the letters with an exacto knife, making homemade stencils. In a stippling motion I painted over the stencils and then removed them. I went over them freehand in order to get the best detailing.

Step 8: I cleaned up any spots that I felt weren't sharp enough and sprayed several coats of Mod Podge paint sealer. I always use the one with the glossy finish. I spray one coat an hour until it's as shiny as I want it to be. Allow it to dry over night and then you're finished!!! (I haven't done this step yet, but i'll update it when I do!)
Let me know if any of you try this!
Happy First of July!!!
No comments:
Post a Comment